Many commercial cleaning products contain volatile organic compounds (VOCs) and synthetic fragrances that can irritate lungs and trigger allergies. Swapping these for DIY non-toxic cleaning products allows you to control every ingredient in your household. This guide provides tested, effective recipes for floors, bathrooms, and kitchen surfaces that avoid harsh chemicals without sacrificing cleaning power.
Why Switch to DIY Cleaning Solutions?
Store-bought cleaners often list ingredients as “fragrance” or “surfactants,” which can mask specific chemicals like chlorine bleach or ammonia. DIY solutions typically rely on a few well-understood ingredients: distilled white vinegar, baking soda, castile soap, and hydrogen peroxide. These items are inexpensive, readily available, and break down into harmless byproducts after use.
The primary benefit is reduced exposure to irritants. While most commercial products are safe when used as directed, frequent use in enclosed spaces can contribute to poor indoor air quality. Making your own cleaners aligns with a broader shift toward conscious consumerism.
For those interested in reducing household waste and clutter, creating your own supplies pairs well with minimalist home organization tips, as you no longer need to store numerous different branded bottles.
Core Ingredients and Their Roles
Before mixing recipes, understand what each component does. This prevents trial-and-error and ensures you treat specific stains correctly.
| Ingredient | Primary Function | Best For | Avoid Using On |
|---|---|---|---|
| White Vinegar | Acidic degreaser; cuts through mineral deposits | Glass, mirrors, kettles, general surfaces | Stone counters (marble, granite), sealed wood |
| Baking Soda | Mild abrasive; neutralizes odors; alkaline scrubber | Tubs, sinks, ovens, odors | Wax-treated wood floors |
| Castile Soap | Vegetable-based degreaser; emulsifies oils | General cleaning, sponges, dishes | Mixing with acidic vinegar in same bottle |
| Hydrogen Peroxide | Antiseptic; bleaches; breaks down into water and oxygen | Disinfecting, stains, mold | Directly on stone, raw food surfaces without rinsing |
| Lemon Juice | Natural acid; fresh scent; mild antibacterial | Grease, citrus stains, deodorizing | Porcelain (can etch), unsealed wood |
The Golden Rule: Acid and Base
The most critical mistake beginners make is mixing vinegar (acid) with castile soap or baking soda (base) in a sealed container. This reaction creates carbon dioxide gas, which builds pressure and can cause bottles to explode or burst. It also neutralizes the cleaning power of both ingredients, leaving you with diluted water and soap scum.
To avoid this, keep acids and soaps in separate containers. Apply them sequentially. For example, spray vinegar first to disinfect and cut grease, then scrub with a solution containing soap and water for the final rinse. Never combine hydrogen peroxide and vinegar in a single mixture, as this creates peracetic acid, a corrosive and hazardous substance that requires industrial handling.
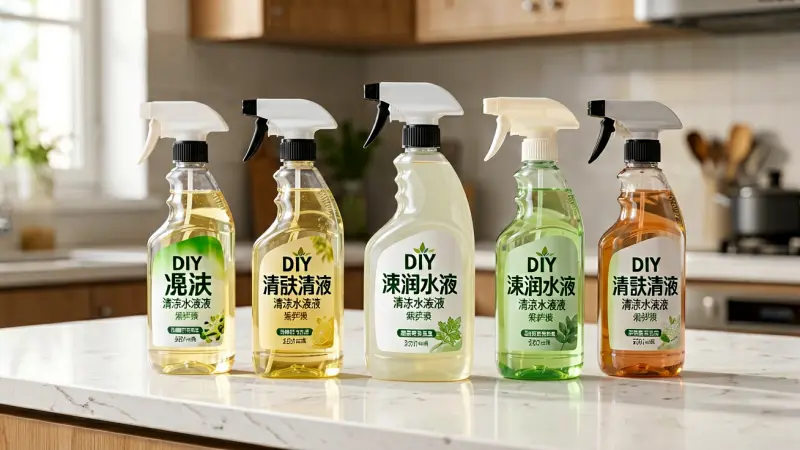
Five Essential Recipes for Every Room
1. All-Purpose Floor and Surface Cleaner
This gentle formula is safe for most hard surfaces, including laminate, tile, and linoleum. It cuts through everyday grime without leaving a sticky residue.
- Ingredients: 1 gallon of water, 1/4 cup of castile soap, a few drops of essential oil (optional).
- Method: Mix the water and soap in a large container. Add essential oils for scent if desired. Use a spray bottle for spot cleaning or dip a mop into the solution for floor care.
Do not add vinegar to this bucket. The acid will break down the soap’s structure, rendering it ineffective. Keep this cleaner in a labeled bucket and pour fresh portions into a spray bottle as needed.
2. Glass and Mirror Shine
Vinegar is the gold standard for glass because its acidity dissolves water spots and soap film. The key is proper application to prevent streaking.
- Ingredients: 1/2 cup distilled water, 1/2 cup white vinegar, 10 drops of lemon essential oil.
- Method: Combine ingredients in a spray bottle. Spray directly onto the glass surface. Wipe with a microfiber cloth using a vertical motion on one side and horizontal on the other to track your progress.
Distilled water is preferred here because tap water contains minerals that leave deposits on glass. If you use tap water, accept that you may see faint spots once the liquid evaporates.
3. Bathroom Tile and Grout Scrub
Bathroom mold and mildew require an alkaline environment to fight the acidic nature of vinegar, or a bleaching agent for tough stains. A baking soda and peroxide paste is highly effective for grout.
- Ingredients: 1/2 cup baking soda, 1/4 cup hydrogen peroxide, 1 teaspoon dish soap.
- Method: Mix into a thick paste. Apply to grout lines using an old toothbrush. Let it sit for 10–15 minutes. Scrub, then rinse thoroughly with water. For general disinfection, create a separate spray with 1 cup water and 1 cup vinegar.
Hydrogen peroxide works by releasing oxygen bubbles that lift dirt and kill bacteria. It is colorless, making it harder to tell if you have applied enough, so apply it generously to dark grout lines.
4. Oven and Pan Grease Remover
Tenacious grease and carbonized food residue need a chemical reaction that heat can accelerate. Baking soda reacts with moisture and heat to loosen debris.
- Ingredients: Baking soda, water.
- Method: Spray water lightly onto cooled oven racks or stove tops. Sprinkle a generous layer of baking soda over the damp surface. Let it sit for several hours or overnight. Scrape off the sludge with a plastic scraper or sponge. Wipe clean with a damp cloth.
For pots and pans, boil water with a handful of baking soda and sliced onions for 10 minutes, then discard the water. This loosens burnt-on food before you even need to scrub. This method is far gentler on non-stick coatings than steel wool or harsh chemical degreasers.
5. Laundry Stain and Odor Treatment
Commercial stain removers often contain enzymes and optical brighteners that can be harsh on skin. A simple vinegar and salt rub is effective for most organic stains and odor neutralizers.
- Ingredients: White vinegar, coarse salt.
- Method: For stains, apply a small amount of vinegar to the fabric and gently rub in. For odors, add 1/2 cup of white vinegar to the rinse cycle of your washing machine. It will smell for the first few loads but the odor disappears once the clothes are dry.
Never use vinegar on silk or wool, as the acid can degrade these natural proteins. Stick to cotton, polyester, and denim for this treatment.
Storage and Labeling Best Practices
Safety is paramount when handling homemade cleaners. Even though the ingredients are common, incorrect storage can lead to accidents.
Always use amber or dark-colored glass bottles for hydrogen peroxide and vinegar. Light degrades these compounds over time, reducing their effectiveness. Label every bottle clearly with the contents and the date of mixing.
Perishable ingredients like castile soap can grow bacteria if left in a warm, open container for months. If you notice cloudiness, separation, or an off-putting smell, discard the mixture and start fresh.
Keep concentrated hydrogen peroxide away from vinegar. If you must store them in the same cabinet, place them on different shelves to prevent accidental leakage and mixing. This simple spatial separation mitigates the risk of creating peracetic acid.
Common Mistakes to Avoid
Mixing Vinegar and Bleach
This is the most dangerous combination to avoid. Mixing vinegar and bleach creates chlorine gas, which is toxic and can cause respiratory damage. Never add vinegar to a bleach bottle, and never add bleach to a vinegar spray. Use them in completely separate areas or at different times. If you mix them, ventilate the area immediately.
Ignoring Surface Compatibility
Not all “safe” ingredients are safe for all materials. Vinegar is acidic. Acid etches stone. Therefore, never use vinegar on marble, limestone, or granite countertops. Instead, use a solution of warm water and a small amount of castile soap. Castile soap is pH-neutral and gentle enough for delicate surfaces while still lifting dirt.
Overusing Essential Oils
While essential oils add scent, they can be allergens and irritants for some people, as well as pets. Stick to one or two drops per cup of solution. More is not better. If you have respiratory sensitivities, consider skipping essential oils entirely or using a small amount of citrus juice for natural scent.
When DIY Isn’t Enough
There are scenarios where commercial products or professional services are superior.
For heavy-duty degreasing in industrial kitchens or grease fires, professional-grade degreasers may be necessary. For mold that has penetrated drywall, DIY solutions only treat the surface. The structure needs to be dried or replaced by a professional.
Similarly, for serious sewage backups, chemical disinfectants or professional cleaning services are required to ensure biohazardous materials are safely removed.
Also, if you have asthma or severe allergies, test any new homemade cleaner in a small area first. Even natural ingredients can trigger reactions in sensitive individuals. Monitor your response and adjust your formula or ventilation accordingly.
Frequently Asked Questions
Can I store DIY cleaners for a long time?
It depends on the recipe. Vinegar and water solutions are stable for several months in a sealed container. Recipes containing hydrogen peroxide lose potency faster, typically within six months. Castile soap mixes can grow mold if water is added and the mixture sits too long in a warm environment. Label everything with a creation date to track freshness.
Are essential oils safe for cats?
Many essential oils are toxic to cats, particularly tea tree, citrus, and pine. Cats lack certain liver enzymes to metabolize these compounds. If you have felines, stick to scent-free recipes or use milder scents like lavender in very low concentrations, but caution is advised.
Will vinegar damage my wood floors?
Diluted vinegar is generally safe for sealed hardwood floors, but undiluted vinegar or excessive water can damage the finish over time. For hardwood, use a minimal amount of water mixed with a drop of soap. Never let water pool on the floor. Wipe it up immediately.
Building a Sustainable Routine
Transitioning to non-toxic cleaning products is about more than just ingredients; it is about establishing a consistent, low-waste routine. Start by clearing out your existing stock. Use up what you have before buying alternatives. Once your shelves are clear, commit to your three core staples: castile soap, baking soda, and vinegar. This trio handles 90% of household cleaning needs.
Integrate these changes with other sustainable lifestyle shifts. Cleaning with natural products pairs well with other slow living practices, such as taking the time to deep clean rather than rush. You can explore more about this mindset in our article on the slow living lifestyle for beginners, which emphasizes intentionality in all household tasks.
Remember that “clean” does not mean “chemical-free.” Water and air contain chemicals. The goal is to reduce exposure to synthetic, industrial-grade additives that have no role in daily hygiene. By taking control of your cleaning supplies, you reduce plastic waste, lower your monthly expenses, and create a healthier environment for your family and pets.
Start small, experiment with the recipes above, and find the balance that works for your home.