Discovering that your ice has melted or your drink has turned warm is frustrating, especially when you rely on your vacuum-insulated tumbler for outdoor adventures or long workdays. If you are asking why your Stanley cup is not keeping ice, it is rarely a sign that the product is defective; rather, it is usually a mismatch between usage habits, environmental conditions, and the physics of insulation. While these tumblers are engineered to last for days, several factors can significantly shorten that window.
This guide breaks down the specific causes behind reduced performance and offers practical steps to maximize the cold retention of your gear.
Understanding Vacuum Insulation Limits
To understand why your Stanley cup is not keeping ice, you must first grasp how vacuum insulation works. The tumbler features two stainless steel walls with a vacuum seal in between, which prevents heat transfer via conduction and convection. However, this system is not magic.
Heat still moves through the cup via radiation and, crucially, through the lid. The vacuum gap stops heat from entering the space between the walls, but it does not stop heat from entering through the top opening. When you open the lid, hot air rushes in, raising the internal temperature and accelerating the melting process.
Therefore, the fewer times you open the cup, the better the ice retention will be.
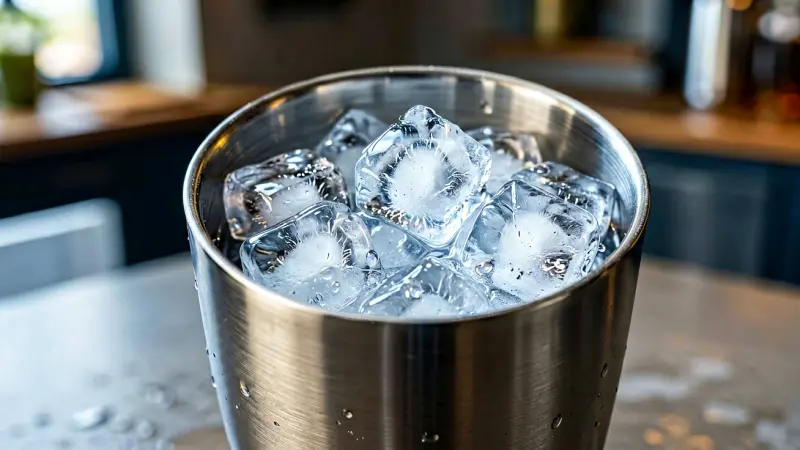
Additionally, the starting temperature of the contents matters immensely. Ice does not just sit in a cup; it acts as a coolant that absorbs heat. If you put a cube of room-temperature ice into a room-temperature cup, the cup itself releases stored heat into the ice, causing it to melt faster.
The cup needs time to “pre-chill.” Think of it this way: a warm metal wall acts like a small heater for the ice. By pre-chilling the tumbler, you remove that internal heat source, allowing the vacuum seal to do its job without competing against thermal mass inside the walls.
Common Causes for Melted Ice
The Lid Seal and Gasket Integrity
The lid is the weak link in any insulated container. Most Stanley lids use a silicone gasket to create an airtight seal. Over time, this gasket can stretch, crack, or become misaligned.
Even if the cup feels “tight,” air leaks can occur if the gasket is worn. If you notice condensation forming on the outside of the cup or feel a slight draft when you hold the lid, the seal may be compromised. A broken seal allows warm air to circulate freely around the ice, drastically reducing the efficiency of the insulation.
You should inspect the silicone ring regularly for nicks or deformations.
Pre-Chilling Missed
This is the most common user error. Many owners simply drop ice into a room-temperature cup. As mentioned, the metal walls hold heat.
To get the best performance, you need to chill the cup itself. The easiest method is to fill the tumbler with ice and cold water for ten to fifteen minutes before pouring it out and adding your fresh ice. This ensures the internal surface temperature is near freezing.
Without this step, you are essentially asking the vacuum insulation to fight the thermal energy stored in two thick stainless steel walls, which depletes the cooling power of your ice cubes much faster.
Environmental Heat Exposure
Even with a perfect seal, external heat affects performance. A Stanley cup left in direct sunlight on a hot day will struggle to keep ice for more than a few hours. The outer surface absorbs solar radiation, heating the metal wall.
While the vacuum layer blocks this heat from entering the drink, the lid remains the primary entry point for thermal radiation. If the lid is metallic or dark-colored, it can absorb significant heat. Furthermore, if the cup is sitting in a hot car or near a heater, the ambient temperature drives the melting process from the outside in.
The insulation slows this down, but it cannot stop it entirely if the temperature differential is extreme.
Incorrect Lid Type Usage
Stanley offers different lid styles, and they are not interchangeable in terms of performance. The flex lid with the straw is generally less effective at retaining cold than the sealed push-pull or screw-on lids. The straw creates a direct conduit for warm air to enter the cup every time you sip.
Even if the push-pull mechanism is closed, there is often a small gap around the straw seal. If you are using the straw lid for long-duration ice retention, you are sacrificing efficiency for convenience. For maximum cold retention, switch to a lid without a straw channel or ensure the straw is removed if the design allows.
Diagnostic Table: Troubleshooting Ice Retention
Use this reference to quickly identify the source of your insulation drop-off. Match your symptoms to the likely cause and apply the suggested fix.
| Symptom | Likely Cause | Recommended Fix |
|---|---|---|
| Condensation on exterior walls | Broken vacuum seal | Contact customer service; replacement likely needed |
| Rapid melting only when drinking | Straw lid air intake | Switch to a non-straw lid or remove straw when not sipping |
| Poor performance on first use | Cup not pre-chilled | Pre-chill with ice water for 15 mins before use |
| Lid feels loose or has visible gap | Worn or misaligned gasket | Inspect silicone ring; replace if cracked |
| Slow but steady warming in heat | High ambient temperature | Store in shade; use a cup sleeve for insulation |
Note that condensation on the outside of the cup is a critical diagnostic indicator. If the vacuum seal is intact, the outer wall should remain at or near ambient temperature. If it sweats heavily while holding cold liquid, the vacuum has likely failed due to impact or manufacturing defect. In this case, no amount of pre-chilling will fix the issue, and you should contact the manufacturer.
Practical Tips to Maximize Cold Retention
Optimize Your Ice Loading
How you pack the ice matters. Loose cubes with large air gaps allow warm air to circulate around the ice faster. Instead of a few large cubes, use a moderate amount of smaller, dense cubes that fill the space more completely.
The air trapped between loose cubes acts as an insulator for the ice, but it also warms up quickly and radiates heat back to the ice. A densely packed layer of ice minimizes the air volume that needs to be cooled each time you open the lid. Avoid packing the cup too tight with ice; you need room for the liquid.
Aim for a layer of ice about one to two inches deep, enough to submerge the liquid but not fill the entire headspace.
Temperature of the Liquid Matters
Never put warm or room-temperature liquid into a cup with ice. This is the fastest way to defeat your insulation. The liquid releases its stored heat into the ice and the surrounding air in the cup, causing rapid melting.
Always chill your drinks in the fridge before pouring. If you are using alcohol, which freezes at a much lower temperature than water, the effect is less severe, but the principle remains: start cold. The colder the initial liquid, the longer the ice will last because the thermal delta between the liquid and the ambient environment is smaller.
Handle with Care During Transport
When moving your cup, keep it upright and avoid jarring. Sliding the cup on a hard surface can scratch the powder-coat finish, which is cosmetic, but more importantly, it can damage the structural integrity of the lid seal area if the cup is knocked over repeatedly. A loose lid allows air exchange, which is the enemy of ice retention.
Use a travel sleeve or a dedicated cup holder in your car to prevent the lid from being jostled open. Every time the lid shifts or unscrews slightly, warm air enters, and you lose insulation progress.
Maintenance and Longevity
Proper maintenance extends the life of the insulation. Clean the cup regularly with warm water and mild dish soap. Avoid using abrasive scrubbers on the interior or the lid gasket, as these can create micro-scratches that trap bacteria and degrade the silicone over time.
Do not put the cup in the dishwasher unless it is explicitly marked dishwasher-safe, as the high heat can warp the plastic components of the lid. Hand washing is the safest bet for preserving the seal. Inspect the lid gasket monthly.
If it looks brittle or has cracks, replace it. Stanley sells replacement gaskets, which is a cheap and effective way to restore performance without buying a new cup.
Also, be mindful of what you pour inside. Carbonated beverages can put pressure on the lid, potentially forcing it open slightly or pushing the gasket outward over time. While this is a minor issue, it contributes to the wear and tear of the sealing components. For the longest-lasting ice retention, stick to non-carbonated, cold liquids and perform regular maintenance checks.
Common Misconceptions
Many users believe that a Stanley cup will keep ice cold for days regardless of conditions. This is a marketing exaggeration. While the cup can keep ice for 24 hours or more under ideal conditions (cool environment, pre-chilled, minimal opening), it will not perform at that level in a 90-degree summer afternoon in direct sunlight.
The performance is dynamic, not static. Another misconception is that the size of the cup matters linearly. A 1-gram cup does not necessarily keep ice twice as long as a 14-ounce cup.
The surface area to volume ratio is key. Larger cups have less relative surface area for heat transfer, so they do hold temperature better, but the difference is not as dramatic as the size difference suggests. Focus on the seal and pre-chilling rather than just buying a bigger cup.
When to Replace Your Tumbler
Eventually, no vacuum-insulated product lasts forever. The vacuum can degrade over decades, or the powder-coat can chip, exposing the metal to corrosion. More commonly, the silicone gasket will fail.
If you have replaced the gasket and pre-chilled the cup, but it is still leaking warm air or showing external condensation, it is time to replace the unit. The cost of a new cup is often less than the hassle of troubleshooting a failed vacuum seal. Look for signs of structural damage, such as deep dents on the body, which can compromise the outer wall’s integrity and accelerate heat transfer.
If the cup looks good and works well, keep it. If it’s failing despite correct usage, move on.
Frequently Asked Questions
How long should a Stanley cup keep ice cold?
Under ideal conditions, a standard Stanley tumbler can keep ice for 24 hours or longer. In moderate temperatures (around 70°F / 21°C) with a good seal and pre-chilling, expect 12 to 24 hours. In hot environments or with frequent lid opening, this time drops significantly, potentially to just a few hours.
The exact duration depends on the starting temperature, ambient conditions, and how many times you open the lid.
Why is condensation forming on the outside of my cup?
If the cup is holding cold liquid and the outside is sweating, the vacuum seal has likely failed. This is a manufacturing defect or result of impact. The vacuum layer is supposed to isolate the inner wall from the outer wall, keeping the outer wall at ambient temperature.
If it’s cold to the touch or forming condensation, the insulation is compromised, and the cup should be replaced or repaired by the manufacturer.
Can I use hot water in my Stanley cup?
Yes, Stanley tumblers are designed for both hot and cold liquids. However, the performance for hot liquids is generally different from cold. The vacuum insulation works for both, but the “keeping hot” time is often shorter than “keeping cold” time because warm liquid loses heat more rapidly to the cooler environment than cold liquid gains heat from a warm environment (depending on the specific temperature delta).
For ice retention, always use the cold setting and pre-chill.
Does the color of the cup affect ice retention?
Yes, indirectly. Dark colors absorb more solar radiation when the cup is in direct sunlight, heating the outer wall. While the vacuum layer blocks this heat from entering the drink, a hotter outer wall can slightly increase the temperature gradient across the lid seal, potentially leading to faster heat transfer through the lid.
Light colors or reflective surfaces tend to stay cooler in direct sun, which can marginally improve overall performance.
Final Thoughts
Your Stanley cup is not keeping ice because of a simple failure of the vacuum technology, but because of how you are using it. The biggest levers you control are pre-chilling the cup, using the correct lid for the duration you need, and keeping the seal intact. If you pre-chill, avoid the straw lid for long periods, and inspect the gasket regularly, you will get the maximum performance the design allows.
If you see condensation on the outside, stop troubleshooting and contact the manufacturer, as that indicates a physical break in the vacuum. Focus on the process, and your ice will stay cold for as long as the physics allow.
Also Read –
Why Does Peanut Butter Taste Different After COVID? Understanding Parosmia
Is 49°F Cold? How Weather, Wind, and Clothing Change the Answer
My Therapist Said I Don’t Need Therapy